1
/
of
1
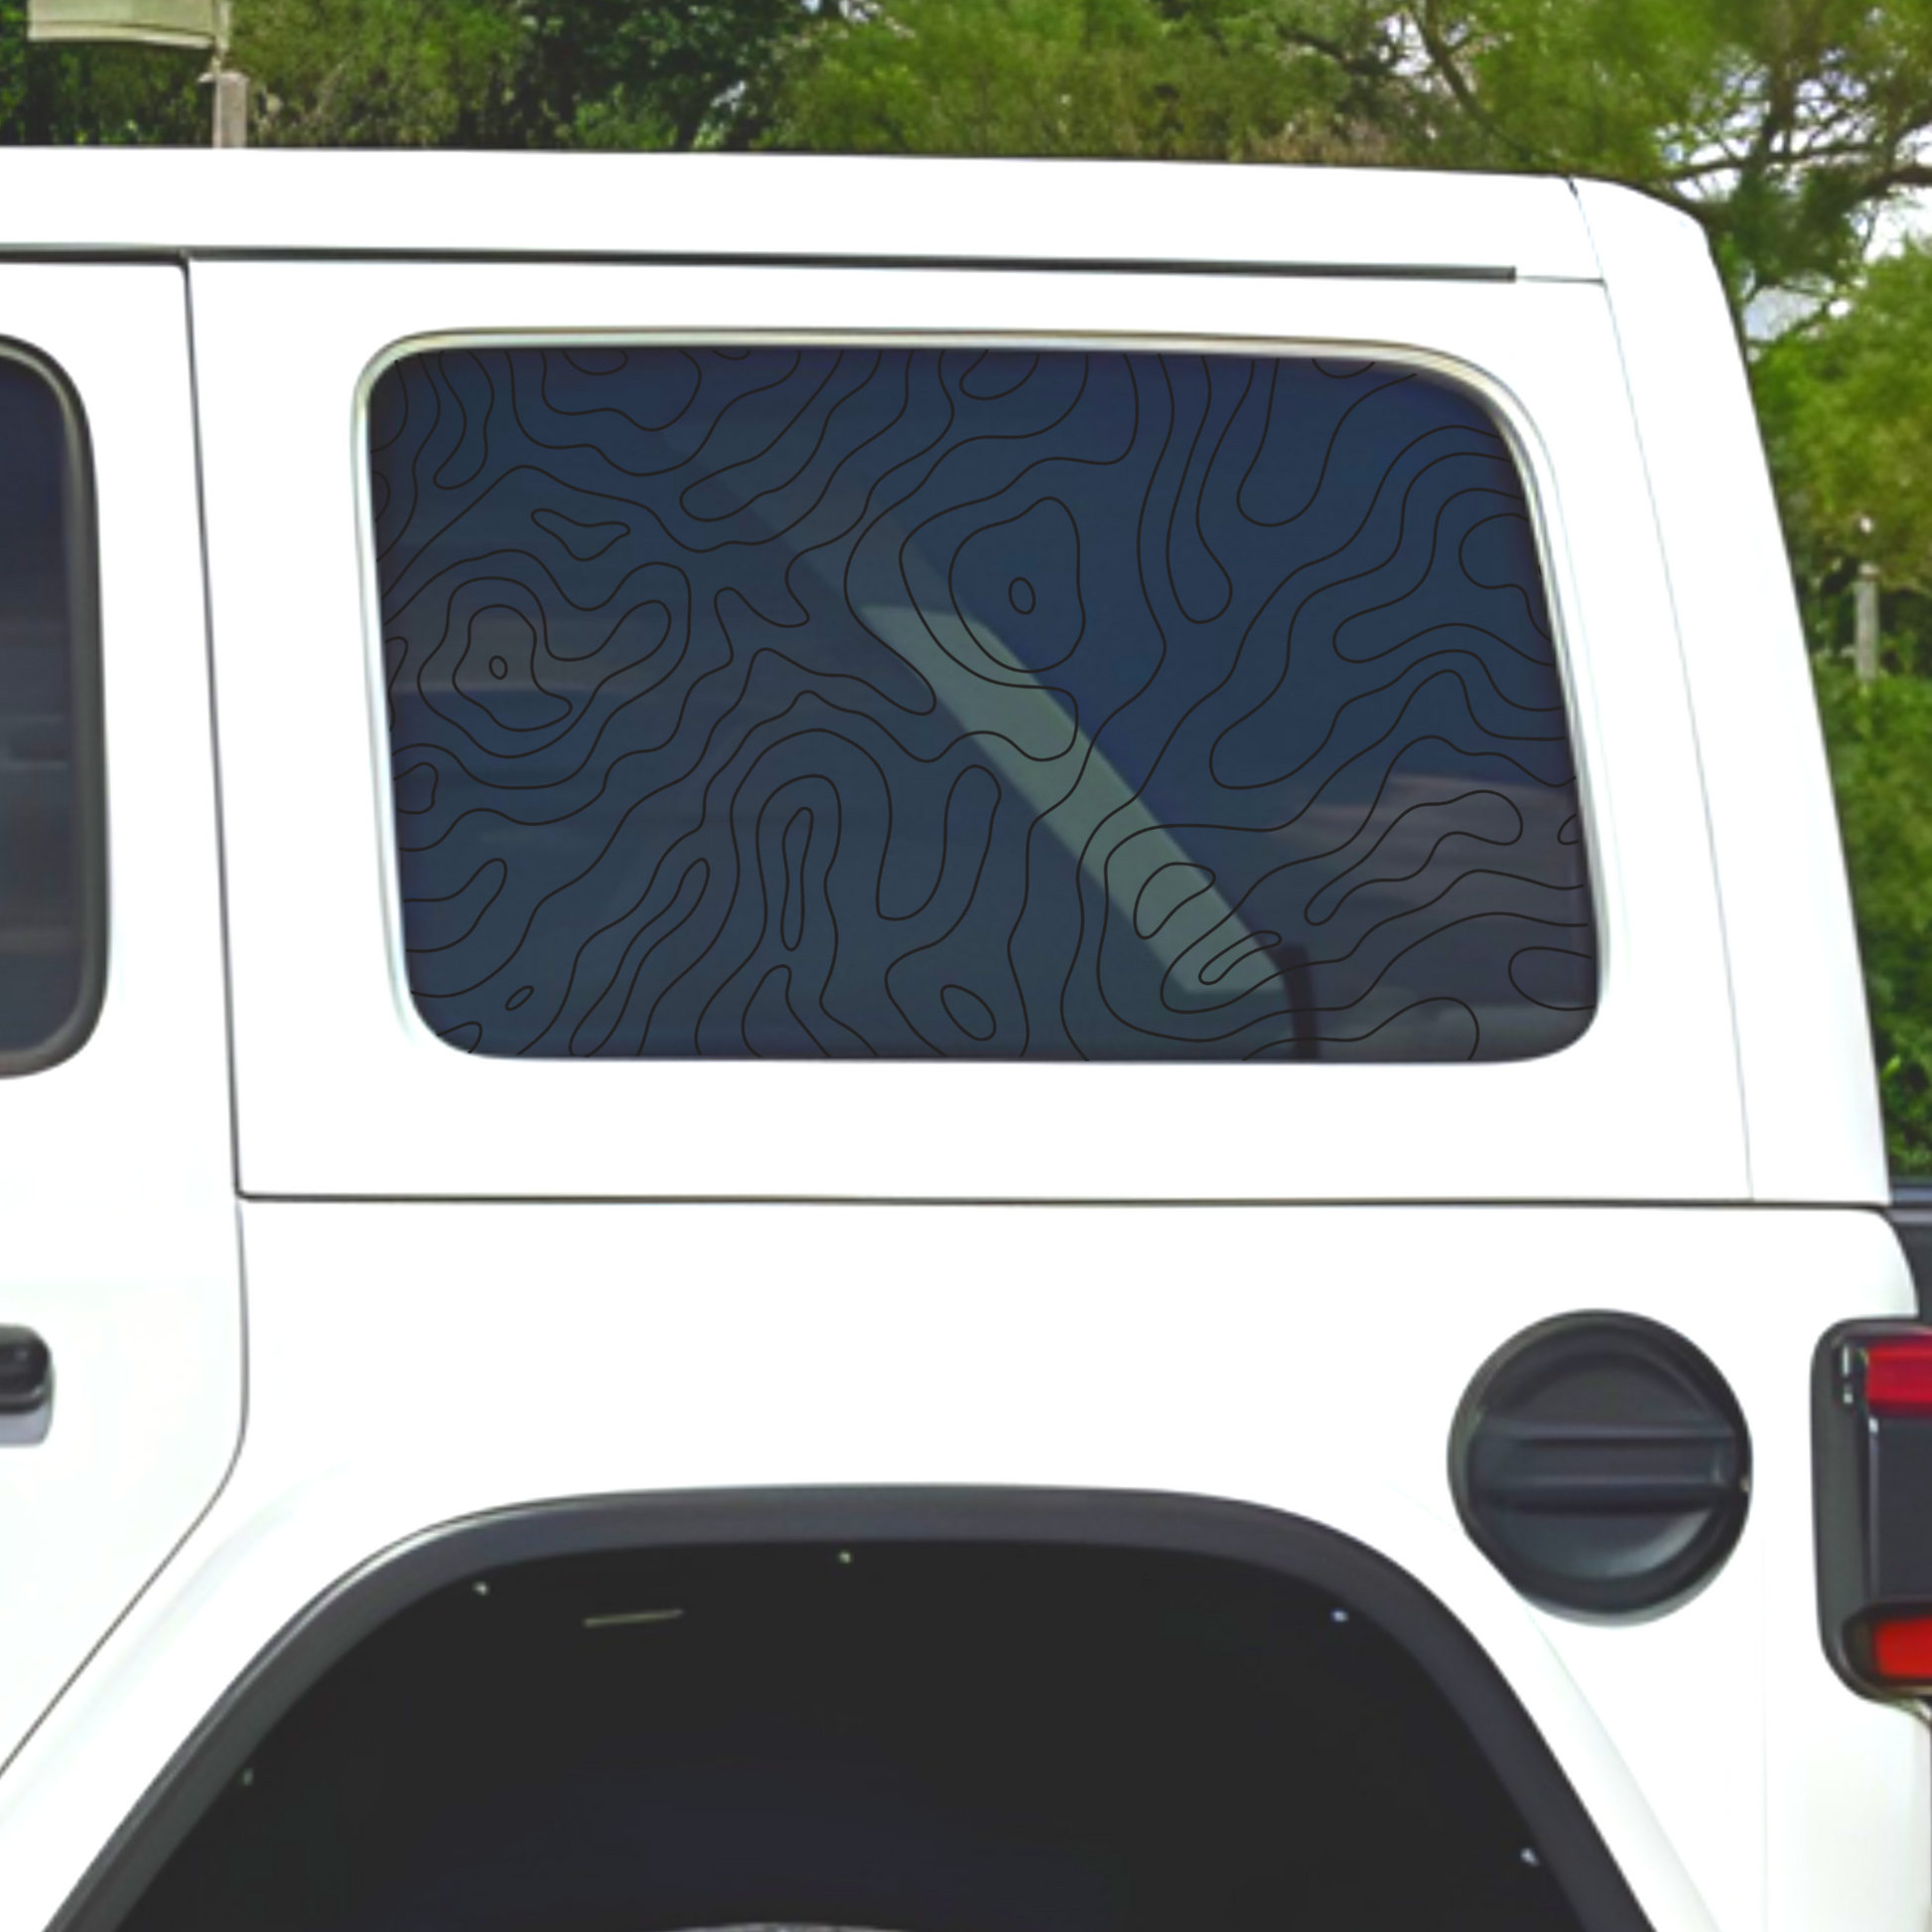
Topographical Map Rear Window Full Coverage Decal
Topographical Map Rear Window Full Coverage Decal
No reviews
Regular price
$55.00 USD
Regular price
Sale price
$55.00 USD
Unit price
/
per
Shipping calculated at checkout.
Couldn't load pickup availability
Make a statement on your ride with our Rear Window Large Decal! Providing full coverage, this decal is sure to turn heads. Its matte black color adds a sleek touch. Trimming IS required, but it's worth it for the bold and unique look it will give your vehicle.
What Comes With This Decal?
- PAIR of rear window decals in matte black
- Decals will be mirrored unless stated otherwise
- Decal installation kit
- Felt tipped squeegee
- Alcohol wipes
- Lint free towel
- Trimming knife
- TRIMMING IS REQUIRED TO ENSURE FULL COVERAGE
PLEASE MEASURE YOUR WINDOW BEFORE ORDERING.
IF YOU REQUIRE THE DECAL TO BE SMALLER / LARGER THAN THE SIZES LISTED PLEASE SEND US A MESSAGE WITH YOUR REQUIRED SIZE. NO REFUNDS OR RETURNS WILL BE ACCEPTED FOR ORDERING THE WRONG SIZE.
How Do I Install This Decal?
There are two ways that you can install this decal and it is up to your preference and confidence installing. If you are unsure how to install, please reach out to us or ask a local tint shop for installation. They will likely charge a small fee.
Wet Install
This method can be difficult and there are many YouTube videos for installation.
*Applied decal temperature range +40°F to +100°F
*Do not install decal to excessively hot surface or extreme cold for best results.
What You Will Need:
• Warm Water + Dish Soap
• Microfiber/ Lint Free Cloth (included with your purchase)
• Squeegee with soft edge (included with your purchase)
• Masking Tape
• Trimming Knife (included with your purchase)
Steps:
- Unroll the decal and lay it flat for a few hours prior to installation. Using the provided squeegee, lightly press across your whole decal to ensure it sticks to the transfer paper.
- Clean the window thoroughly with warm soapy water and dry with a lint-free cloth. Use included alcohol pads for areas that still seem sticky after washing.
- Before removing the paper backing, place the decal in the desired position by using pieces of masking tape or painter's tape at the top center and bottom center of the decal.
- Peel the vinyl decal away from the paper backing. Once you have peeled back about half of the decal, cut the paper backing off and discard it.
- Spray the exposed glass and adhesive side of the decal with your mixture of soapy water. Using the included squeegee, apply the half of the graphic that has been pulled back by starting at the middle and working towards the end while applying pressure as you lay the graphic down. Take your time with this and keep tension on the graphic to avoid it laying down before you want it to. Squeegee out all of the soapy water from this half of the applied decal.
- Repeat steps 4-5 for the other half of the decal.
- Using the included trimming knife, slowly and carefully trim around your window, ensuring you are not cutting any window seals.
- Squeegee out any remaining water if possible. let dry for 10-15 minutes before peeling back the transfer paper. If any pieces of the decal peel up during this process, lay the transfer paper back over it and use the squeegee to lay the piece of decal down again.
Dry Install
*Applied decal temperature range +40°F to +100°F
*Do not install decal to excessively hot surface or extreme cold for best results.
What You Will Need:
• Microfiber/ Lint Free Cloth (included with your purchase)
• Squeegee with soft edge (included with your purchase)
• Masking Tape
• Trimming Knife (included with your purchase)
Steps:
- Unroll the decal and lay it flat for a few hours prior to installation. Using the provided squeegee, lightly press across your whole decal to ensure it sticks to the transfer paper.
- Clean the window thoroughly with warm soapy water and dry with a lint-free cloth. Use included alcohol pads for areas that still seem sticky after washing.
- Before removing the paper backing, place the decal in the desired position by using pieces of masking tape or painter's tape at the top center and bottom center of the decal.
- Peel the vinyl decal away from the paper backing. Once you have peeled back about half of the decal, cut the paper backing off and discard it.
- Using your squeegee, apply the half of the decal that has been pulled back with the transfer tape by starting at the middle and working towards the outside. Take your time with this and keep tension on the decal/transfer tape to avoid it laying down before you want it to.
- Repeat Step 5 for the other half of the graphic.
- Using the included trimming knife, slowly and carefully trim around your window, ensuring you are not cutting any window seals.
- Peel back the transfer paper slowly, pulling across and not out towards you. If any parts of the graphic stick to the transfer paper, lay it back down and using your squeegee to apply pressure to that spot.
IF YOU ARE STILL UNSURE HOW TO INSTALL THE DECALS, PLEASE SEARCH ON YOUTUBE FOR IN DEPTH STEP BY STEP VIDEOS OR REACH OUT TO A LOCAL TINT SHOP.
